
Hi, it’s Jamaica. Today I thought I’d share the little book I made with my photos from Ali’s Day in The Life last month. I had grand schemes for my album originally with full page spreads and embellishments but the longer I waited to work on it, the less likely I knew it was.

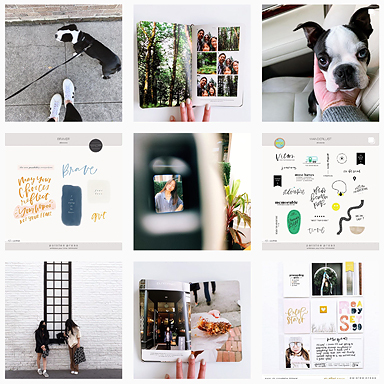
Instead, I simplified. Super simplified. The entire thing is made of one piece of scrap cardboard (thank you Studio Calico box), a giant brass brad and a handful of photos formatted using the Minimalist 3×4 Templates.

I went with Template 4B from the Minimalist 3×4 Templates, the one with an extra white space at the top, for all of my photos. With the title moved to the bottom, the white band was perfect for the brad/hole punch. Plus, the closer-to-square size of the photo gave me more flexibility in using both horizontal and vertical photos.
Here’s a look at all my photos from the day—I just added the time in white to the bottom of each.

After printing out my 3″ x 4″ photos, I cut the cardboard down into two pieces 3″ wide by 4 1/8″ tall. The extra 1/8 of an inch gives me a little extra clearance for the head of the brad which is almost 1/2″ wide so that it wouldn’t overhang the top of the book.

Using one of the photos as a guide, I punched the hole in the center of the white band and used that to determine where to punch the holes in the covers. Then, I lightly scored and folded the cardboard where it aligns with the top edge of the photos inside. That way when I open the front cover (aka, bend it back) and flip thru the pages you can’t see the white border at the top.


You can still see the white edges when you swivel the cover up or fan the pages out but it doesn’t bother me at all.

I realized quickly that it doesn’t function as nicely as a binder ring but I love the way it looks. The giant brass brad is fun and different. I figured aesthetics could win over functionality for this little book since it’s one I know I won’t be flipping through often.

Here’s a quick video showing how it works—admittedly, not the smoothest, but it took me about 45 minutes to put together and I had fun doing it. No planning, no gluing, no redos. Just photos, a box and a brad. It’s a great reminder that simple is good. Not everything has to be fancy or use a lot of product. Making something is always better than making nothing. Right?
xo, jamaica
See more of my projects here or follow me online at my blog, on Instagram or see what inspires me on Pinterest.


How are you printing the 3×4 minimalist cards? I tried printing them on 4×6 printer paper in my Canon Pixma920. Part of the image gets cut off. Is there a tutorial somewhere for reference? THANKS!
Hi Adeline—I changed the canvas size to 6×4 so that I could print two 3×4 cards side by side and then cut them in half. I’m not sure what type of computer or printer you’re using but it could be that your print driver is enlarging the image to make sure it prints to the edges. For me, there’s a setting called Borderless Printing that I set to minimum. I’d look to see if you have something similar in your printer settings. Good luck!
Thanks Jamaica! I’m on a Mac Desktop using a Canon Pixma printer. I’d been doing the 4×6 borderless, but I had to reduce the image in Page Setup in Photoshop to 97%. For whatever reason the printer driver still wanted to enlarge the image. Thank you for the tips, they helped!
all i can say is you are amazing, jamaica!
this is incredible!
love everything about it.
looks so fun! thanks for the inspiration. the perfect size and so easy to do. I plan to do a Day in the life soon and for sure I will make such a little fun mini too. 🙂
Sabine