
I’ve been documenting with pocket pages for the last five years, and while it’s been a really streamlined way to do memory-keeping, it seems there’s always a way to simplify the process.
When I sat down to select the photos for a few days we spent in London, I started with pocket guide no. 2. The 4×6 and 3×4 templates serve as a way to put together a simple 12×12 page.
I used them as a jumping off point, and then mixed the templates with full photos and white journaling cards to put together two 12×12 pages.
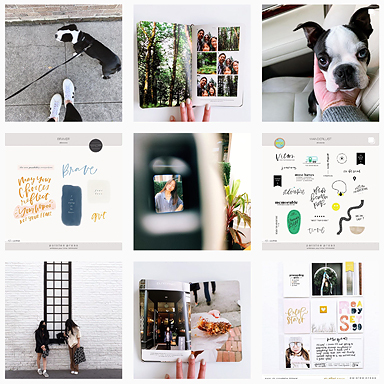
Here’s the full layout:

The layout came together so quickly – I may have converted permanently to these pocket guides!
Here’s a close-up of the left side:

In my pocket page layouts, I almost always include a mix of white space, photo templates, and hand-lettering. Choosing which templates and elements to use can take a lot of time, so I loved working with the pocket guide, which did all the work for me.

I used a plain white 3×4 card to add a little white space and a title for the page.

The hand-lettered graphic element was part of the pocket guide. I used a digital paper from backyard bbq as the background.

Here’s a close-up of the right side:

There was a lot of color on this page with the full-bleed photos so I added this white “heart” card from the Project Life Everyday Edition to the layout.

The photo template is from pocket guide no. 2. I love the mix of photo templates next to full-bleed photos.

For the other journaling cards, I created a simple itinerary on a plain white 3×4 card and I trimmed a map of the underground to fit in a 3×4 pocket.

This layout came together quicker than any I’ve ever created. If you spend a lot of time sifting through your digital products to find just the right mix of templates, lettering, and graphic elements, I would definitely recommend giving Liz’s pocket guides a try. For me they’re a game-changer!

Do you spend a lot of time picking out the elements you’ll use in a layout? What do you do to simplify the process?
You can check out more of my pocket page layouts over on my blog, or sign up for my newsletter for a little creative inspiration each week.
xo,
Catherine
Products used: backyard bbq papers, pocket guide no. 2, Project Life Everyday Edition, Design A pocket pages.


I love how you used those pocket guides! So simple, but so intentional. Some days I feel like getting crafty with my layouts and spreads and other days, those guides are perfect for getting the story done and documented.
I’m totally with you, Jessica! I love fishing around my digital stash for just the right elements, but if you’re short on time, this is a great solution. Well put! xo, Catherine
I always enjoy your work and your posts on this blog! I love both your PL pages (and your website) and this blog a lot. Maybe a silly question, but do you first make your spreads digital, placing your photos on that 12×12 template, and then – from the template – you select and print each 6×4 photo physically and put them in “real” pocket pages?
Hi Ingrid! I start by sketching out the layout on paper (I’m a paper girl at heart), and then I work on each “pocket” individually. For this layout, I used the individual 4×6 and 3×4 templates from Liz’s kit and I print everything as 4×6 photos, cutting any of them in half as needed to make them 3x4s. I hope that helps! Thanks for your kind words 🙂 xo, Catherine